Azure Functions のタイマー トリガーを使用して、Azure Machine Learning のコンピューティング インスタンスを自動停止する方法を紹介します。
Azure Machine Learning のコンピューティング インスタンスは、一度起動すると停止操作を行わない限り起動し続けます。起動時間に比例して仮想マシンの課金が発生しますので、停止忘れてしまった時の料金が思いのほか大きいこともあります。
本記事では、Azure Functions のタイマー トリガーを使用して、Azure Machine Learning SDK (AzureML SDK) のコードを決まった時刻に実行させることで、コンピューティング インスタンスを自動停止させる方法を紹介します。
(補足)
Azure Automation は Azure Machine Learning CLI および Python 3 (Preview 段階) の実行をサポートしていないため、本記事では触れておりません。
(参考情報)
- チュートリアル:Visual Studio Code を使用して Python でサーバーレスの Azure Functions を作成してデプロイする
- Azure でタイマーによってトリガーされる関数を作成する
事前準備
本記事では、Visual Studio Code を使用して Azure Functions へデプロイを行います。事前に以下を満たしているかご確認ください。
- Azure Machine Learning ワークスペース リソースの作成
- Azure Machine Learning ワークスペース リソースへのサービス プリンシパル認証設定
(手順参考) 「Authentication in Azure Machine Learning」 の Service Principal Authentication セクション - Visual Studio Code のインストール
- Azure Functions 拡張機能 のインストール
設定手順
Azure Functions のリソースの作成
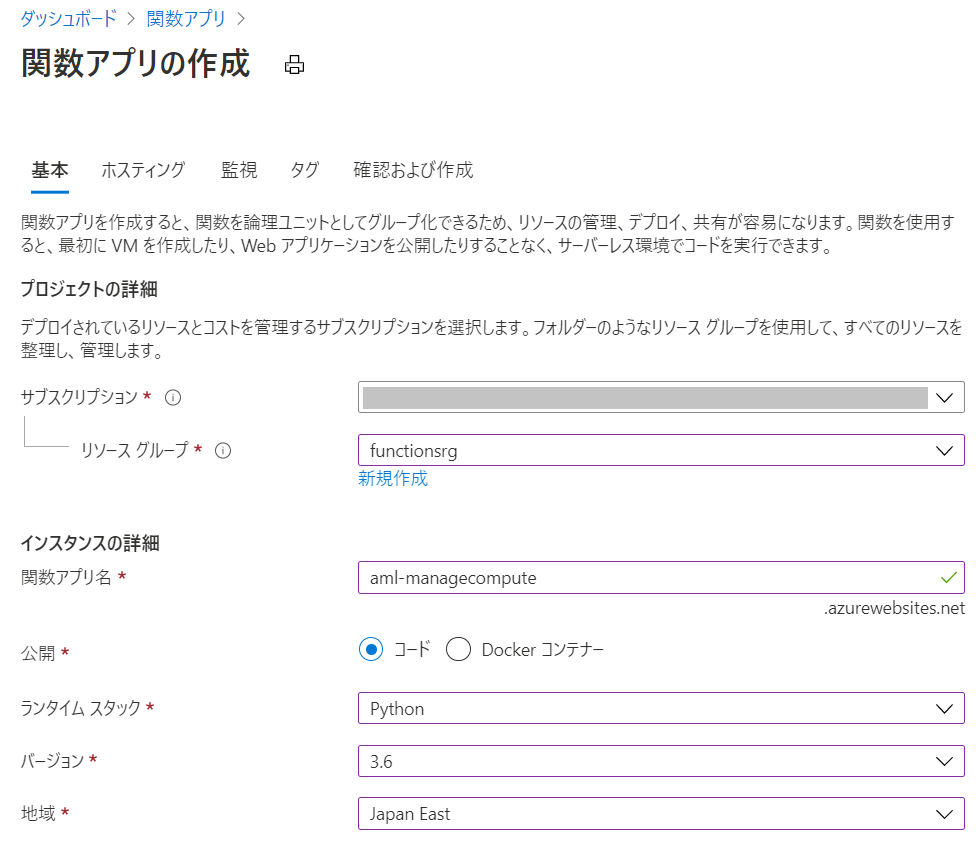
Azure ポータルより Function App リソースを作成します。設定項目は、後述の画像を参照ください。Visual Studio Code からも作成可能ですが、リソース グループの指定ができないため、本手順では Azure ポータルを使用します。
(参考) Azure Portal で初めての関数を作成する
(参考) クイック スタート:Visual Studio Code を使用して Azure で関数を作成する
設定例:
- リソース グループ名: ※ 任意、本手順では functionsrg
- 関数アプリ名: ※ 任意、本手順では aml-managecompute
- 公開: コード
- ランタイム スタック: Python
- バージョン: 3.6
- 地域: ※ 任意、本手順では Japan East を選択
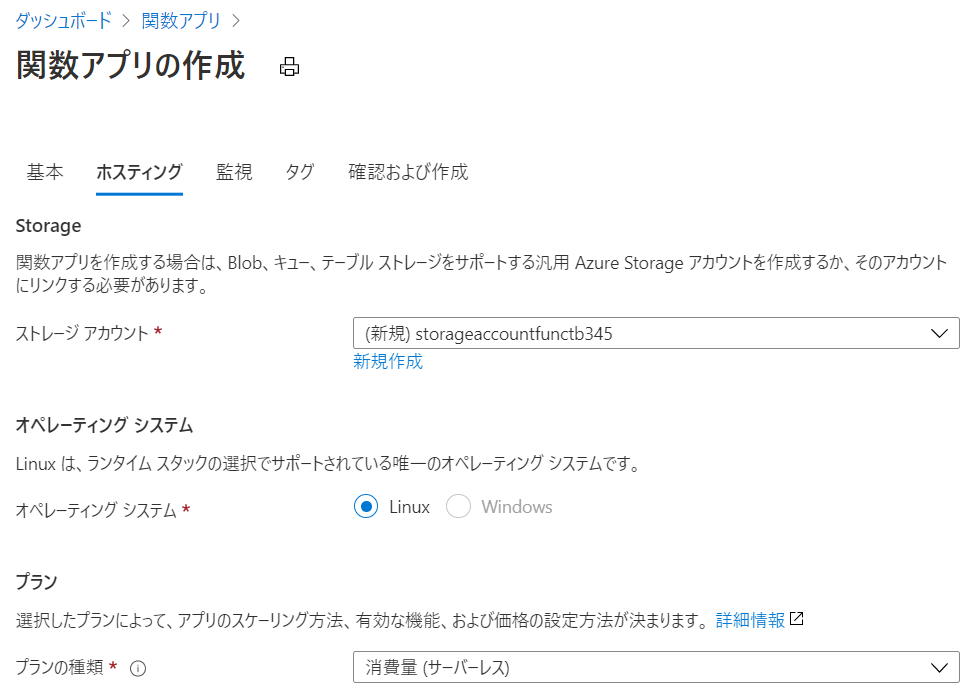
設定例:
- Strage: ※ 既定のまま使用
- オペレーティング システム: Linux
- プランの種類: 消費量 (サーバーレス)
Azure Functions プロジェクトの作成
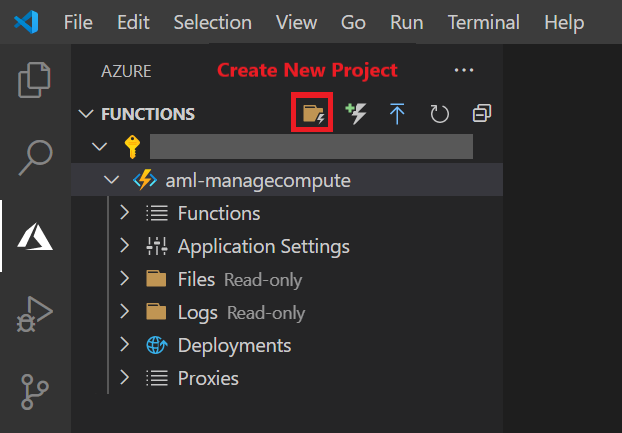
Visual Studio Code を起動し、新しいプロジェクトを作成します。
- アクティビティ バーの Azure アイコンを選択、 [Functions] 領域で [Create New Project (新しいプロジェクトの作成)] アイコンを選択します。
- 「Select the folder that will contain your function project (関数プロジェクトを含めるフォルダを選択してください)」 では Browse を選択し、Functions 専用のフォルダーを指定します。

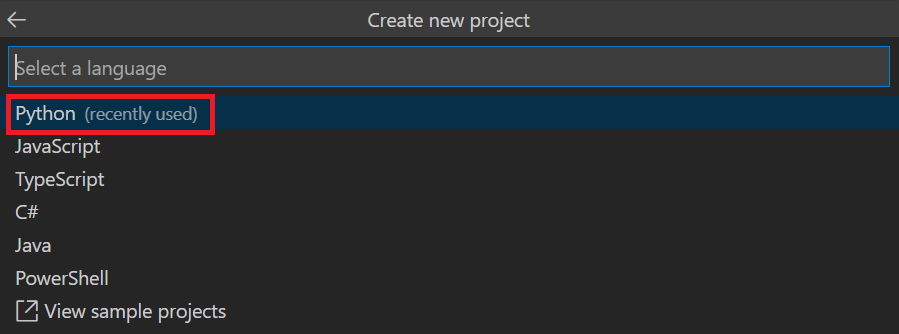
- 「Select a language for your function project (関数プロジェクトの言語を選択してください)」 では [Python] を選択します。
- 「Select a Python alias to create a virtual environment (仮想環境を作成する Python エイリアスを選択してください)」 では Python インタープリターの場所を選択します。
場所 (以下画像の py 3.7.5 のようなパス) が表示されない場合、[Skip virtual environment] を選択ください。

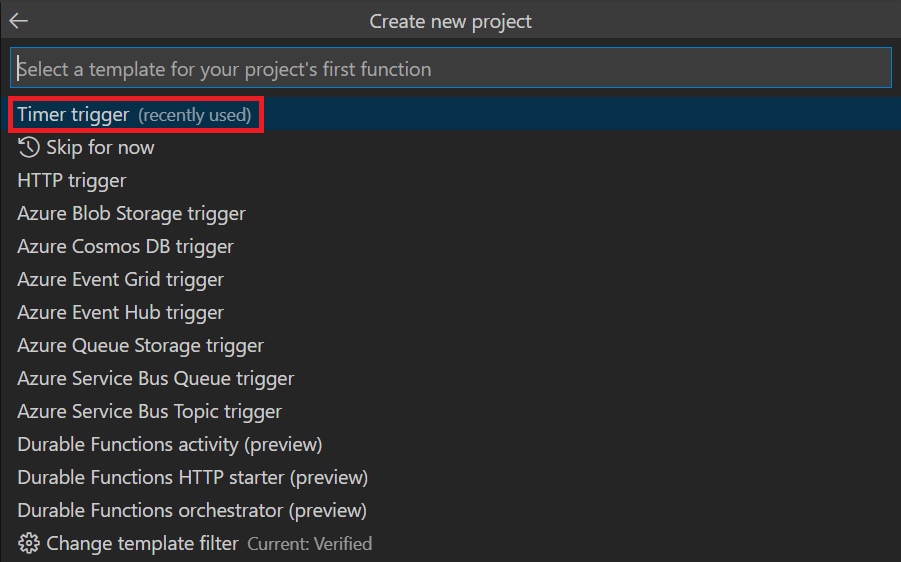
- 「Select a template for your project’s first function (プロジェクトの最初の関数のテンプレートを選択してください)」 では [Timer trigger] を選択します。
- 「Provide a function name (関数名を指定してください)」 では任意の名前を指定します。
本手順では既定値 [TimerTrigger1] を使用します。

- 「Enter a cron expression … (cron 式を入力してください)」 では、自動停止を実行したい時刻を指定します。
後から変更可能なので、既定値のままスキップください。

コード ファイルの編集
Azure Functions プロジェクトに含まれるコード ファイル (__init__.py、function.json、requirements.txt) を編集します。
__init__.py
- ServicePrincipalAuthentication 関数の <Tenant ID>、<Client ID>、<Client Secret> の設定は、下記サイトの [Service Principal Authentication] セクションを参照ください。
(参考サイト) Authentication in Azure Machine Learning - <Workspace Name>、<Subscription ID>、<Resource Group Name> は、ご利用の Azure Machine Learning ワークスペース リソースの情報を入力ください。
- 停止したいコンピューティング インスタンス名を指定する場合、<Compute Instance Name> に停止したいコンピューティング インスタンス名を指定した配列 compute_name を定義します。
- 「type(computes[c]) == ComputeInstance」 部分の “ComputeInstance” を “AmlCompute” に変更することでコンピューティング クラスターを指定することも可能です。
(参考サイト) compute Package - コンピューティング インスタンスの停止処理は、下記サイトの ComputeInstance クラスの stop 関数を使用します。起動させる場合には、state が “Stopped” という条件で、start 関数を実行するようにします。
(参考サイト) ComputeInstance class1
2
3
4
5
6
7
8
9
10
11
12
13
14
15
16
17
18
19
20
21
22
23
24
25
26
27
28
29
30
31
32
33
34
35
36
37
38import datetime
import logging
import azure.functions as func
from azureml.core.workspace import Workspace
from azureml.core.compute import ComputeTarget, ComputeInstance
from azureml.core.compute_target import ComputeTargetException
from azureml.core.authentication import ServicePrincipalAuthentication
def main(mytimer: func.TimerRequest) -> None:
# サービス プリンシパル認証の設定
svc_pr = ServicePrincipalAuthentication(
tenant_id="<Tenant ID>",
service_principal_id="<Client ID>",
service_principal_password="<Client Secret>")
# ワークスペース情報の取得
ws = Workspace.get(name="<Workspace Name>",
subscription_id="<Subscription ID>",
resource_group="<Resource Group Name>",
auth=svc_pr)
# ワークスペース内の全てのコンピューティング インスタンス名の取得
computes = ws.compute_targets
compute_name = [c for c in computes if type(computes[c]) == ComputeInstance]
# 停止したいコンピューティング インスタンス名を指定する場合
# compute_name = ["<Compute Instance Name>", "<Compute Instance Name>", ...]
# Running 状態のコンピューティング インスタンスを停止実行
for i in compute_name:
state = ComputeInstance(ws, i).get_status().state
if state == "Running":
ComputeInstance(ws, i).stop(wait_for_completion=False, show_output=False)
logging.info(f"{i} state is {state} now. The auto-stop process is executed.")
else:
logging.info(f"{i} state is {state} now. The auto-stop process is NOT executed.")
- ServicePrincipalAuthentication 関数の <Tenant ID>、<Client ID>、<Client Secret> の設定は、下記サイトの [Service Principal Authentication] セクションを参照ください。
function.json
shchedule 部分を編集することで実行時刻を変更可能です。指定方法は以下のサイトが参考になります。- (参考サイト) NCRONTAB 式
- (参考サイト) NCRONTAB の例
- (参考サイト) NCRONTAB タイム ゾーン
なお、UTC 指定となりますので、JST で指定する場合には 9 時間を差し引いた時刻を指定ください。以下画像では、毎日 21:25:00 JST に起動する設定としています。
1
2
3
4
5
6
7
8
9
10
11
{
"scriptFile": "__init__.py",
"bindings": [
{
"name": "mytimer",
"type": "timerTrigger",
"direction": "in",
"schedule": "0 25 12 * * *"
}
]
}requirements.txt
azureml-core を追加します。1
2
3
4
5
6# DO NOT include azure-functions-worker in this file
# The Python Worker is managed by Azure Functions platform
# Manually managing azure-functions-worker may cause unexpected issues
azure-functions
azureml-core
プロジェクトのデプロイ
Visual Studio Code より、Azure Functions プロジェクトのデプロイを行います。デプロイ後にコード ファイルの再編集した場合でも、再度デプロイを実行することで変更を反映することが可能です。
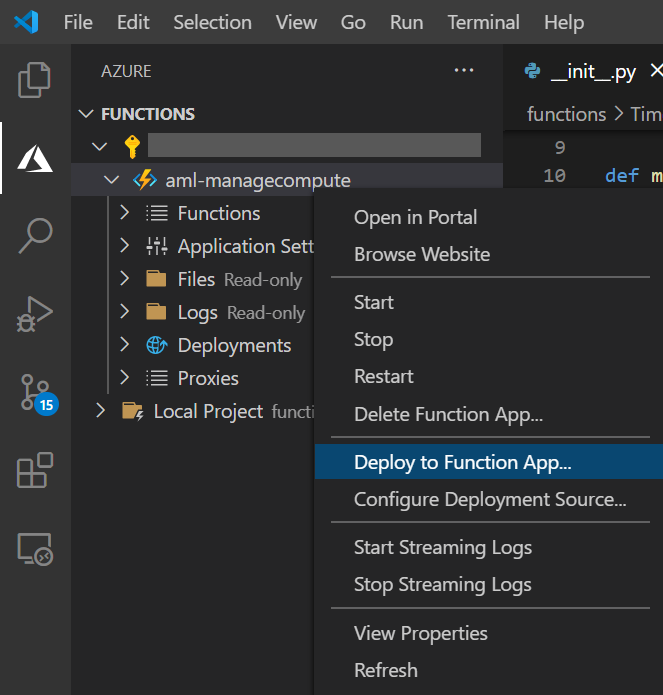
Visual Studio Code の [Functions] 領域より作成した Azure Functions リソースを右クリックし、[Deploy to Function App…] を選択します。
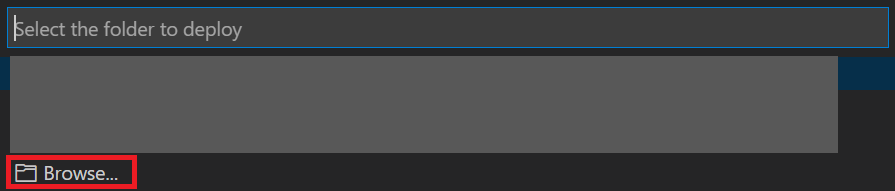
「Select the folder to deploy」 では Browse を選択し、Functions 専用のフォルダーを指定します。
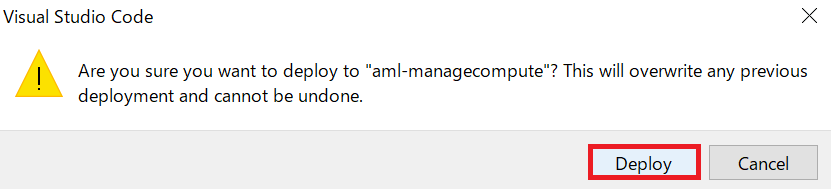
上書き確認の警告メッセージがポップアップしますので、[Deploy] を選択して続行します。
動作確認
Azure ポータルより、作成した Function App リソースの [関数] メニューを表示し、タイマー トリガーが存在し、有効になっていることを確認します。

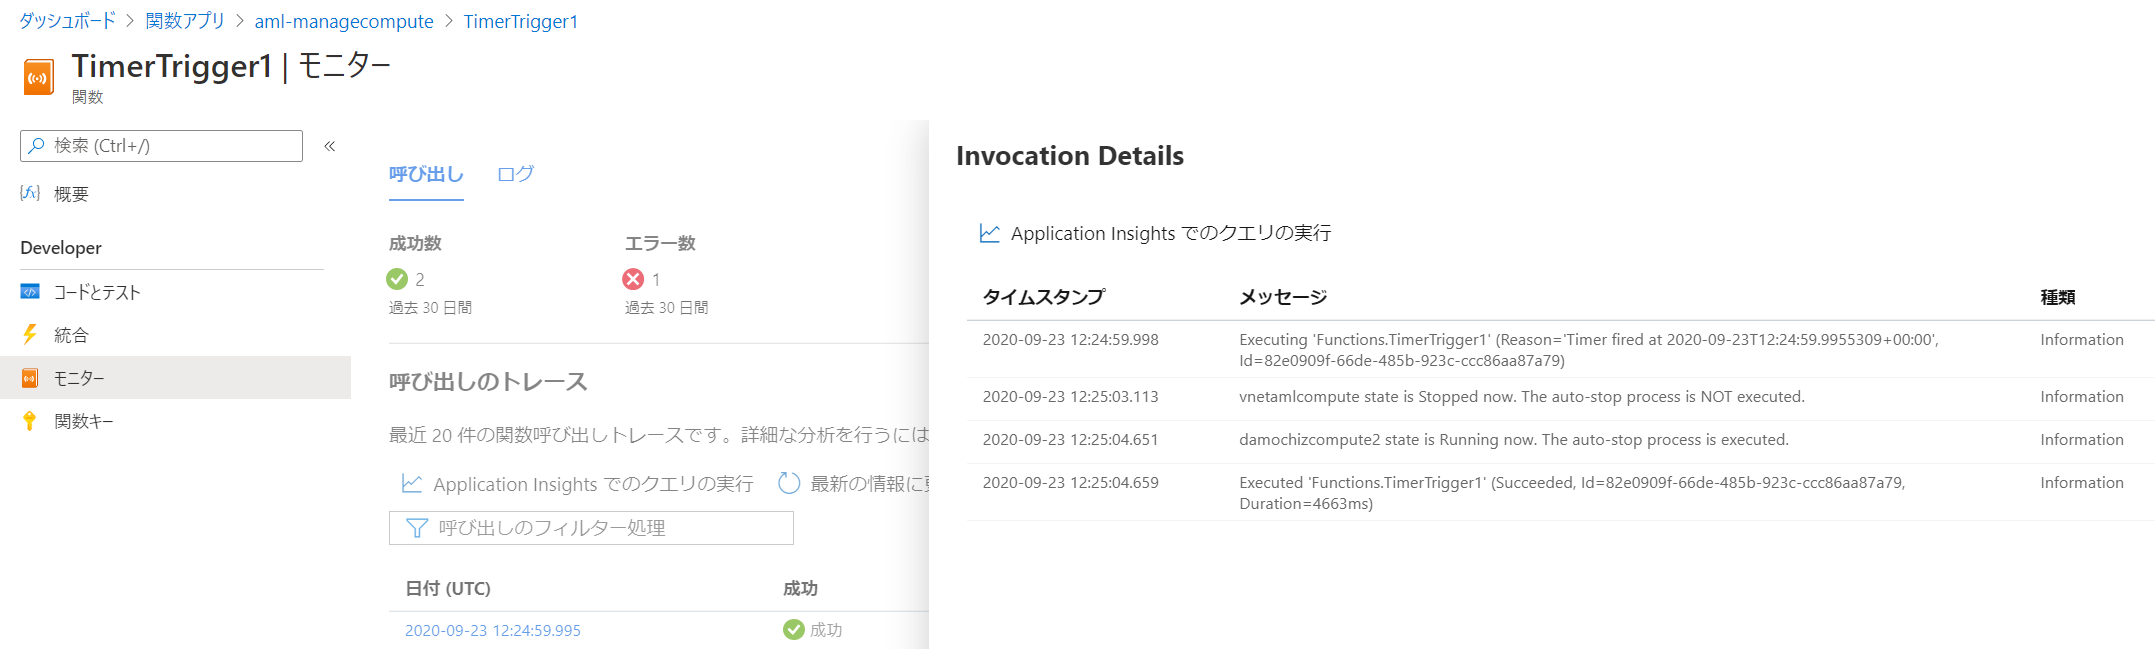
タイマー トリガーのリンクをクリックすると、デプロイした設定や動作履歴を確認することが可能です。下記画像は、[モニター] メニューより 12:24:59 UTC (-> 概ね 21:25:00 JST) にトリガーが実行されていることが確認できます。
(参考) AzureML CLI を使用する場合
Azure Machine Learning CLI (AzureML CLI) は Azure CLI への拡張機能です。下記サイトに具体的な使用方法が紹介されております。
関連するコマンドは以下サイトより確認可能です。
本記事では時刻実行する方法については言及せず、コンピューティング インスタンスの起動停止に関連する操作部分のみ抜粋して以下に紹介します。
1 | # Azure サブスクリプションへの CLI の接続 |
変更履歴2020/09/24 created by Mochizuki2020/09/28 modified by Mochizuki
※ 本記事は 「jpmlblog について」 の留意事項に準じます。
※ 併せて 「ホームページ」 および 「記事一覧」 もご参照いただければ幸いです。